Setting Up and Mapping Monitors to Samplers and Sampler Channels
This walk thru will explain how a user can create and load the necessary transaction to associate speciation samplers with monitors so that flow quality assurance data can be submitted.
A sampler is the physical piece of equipment.
This is the top of a sampler with 8 channels, 3 of which are being used.

Here the sampler cover is down and the filters can be seen in three of the channels.

In AQS, a monitor is defined as a parameter measured at a site. Thus each filter will be associated with a monitor for each parameter that the filter is analyzed for (typically between 3 and 60 parameters for each filter).
[Note] this tutorial assumes that the user has already setup the samplers and sampler channels.
The user should verify the samplers and sampler channels are setup. To do this the user will open the Maintain Site Samplers form. After logging in to AQS the user will select Maintain from the Menu Bar then select Site Sampler from the drop down menu. This will open a blank Maintain Site Samplers form.

Here the user should fill in the relative information.

Then the user will click the Execute Query icon. This will populate the form and allow the user to verify Samplers and Sampler Channels.

If there are multiple samplers the user can click the Next Record icon to move to the next sampler.
In order to set up and map monitors to samplers and sampler channels the user will create a text document containing AQS Monitor Channel (MP) transactions. Each transaction should contain:
- Transaction Type, which will be MP, for monitor channel
- Action Code, which will be I, for insert
- State Code
- County Code
- Site ID
- Parameter
- POC
- Sampler ID
- Channel Number
- Begin Date, this is the begin date for the affiliation of the monitor to the sampler.

The user may also run a report that will list a transaction for all samplers, sampler channels, and parameters associated with the site to assist in the creation of the text file.
The user will select Retrieval from the Menu Bar then select Standard Report Selection from the drop down menu. This will open the Standard Report Criteria Selection form. In the Report Code field the user will use the drop down to select the Extract Site/Monitor Data Report (AMP 500).

After this selection is made the user will click the Data Selection tab. The user will then fill in all the relative fields. In Protocol Criteria area of the form the user will choose ALL for pollutant type.

The user will then click on the Report Options tab. Then click the Uncheck All button on the form.

The user will then select MONITOR BASIC by clicking the check box to the right of the selection.

The user will then scroll down and select SITE SAMPLERS and SAMPLER CHANNELS.

The user will then click the Generate Report button. The user may use this information in creating the text file needed to create and map the monitors to the appropriate samplers and sampler channels.

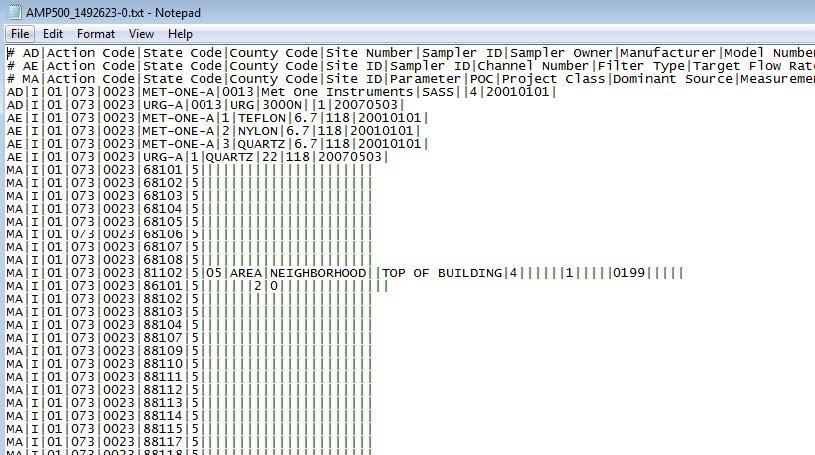
Here the user can see the three selections that were made:
- AD is Site Sampler
- AE is Sampler Channel
- MA is Monitor Basic

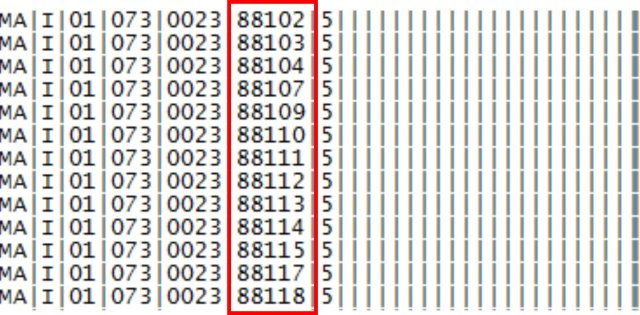
And all of the Parameters associated with the site.

The MA transactions can be used as a template to create the MP transactions described earlier. The MA transactions will contain the monitor identifier (state + county + site + parameter + POC) for all monitors at the site. These can be edited, duplicated, etc. to create the necessary valid MP transactions.
After the user creates the text file he can then submit it through the ENSC (Exchange network Services Center). Once the submission is complete all of the monitors should be appropriately mapped to the samplers and sampler channels.
Previous | Next
